Swift初心者がカメラでの画像撮影について書いたメモです。
普段はTitanium使っててこの辺は楽してます。
あんまり詳しく無いけど Objective-C でなら書いた事あります。
先日作ったViewController へ実装していきます。
主なカメラ撮影の方法
iOSでのカメラ撮影といえば、主に2種類の方法があります。
- UIImagePickerController: UIKitに含まれる。お手軽。
- AVFoundation Framework: 面倒だけど色々できる。
自分は画像を加工とか解析とか色々アレしたりする事が多いので、後者を使います。
前者はTitaniumでいうとTi.MediaのshowCameraとかあたりになります。Tiはこの辺が抽象化されていて扱いがすごく楽で良いのですが、その反面出来ることが限られるので、凝った事しようとすると結局モジュールを作って後者をObjective-Cで書くことになり、AVFoundationだけまぁまぁ判るという事になったりします。
AVFoundation Frameworkで使うクラス達
AVCaptureSession (AVキャプチャセッション)
AVFoundationにおけるキャプチャ入出力をハンドリングする為のクラスです。
まぁ、そういうものだとまる覚えします。
AVCaptureDevice (AVキャプチャデバイス)
前背面カメラやマイク等のデバイスそのものを表すクラスです。
AVCaptureDevieInput (AVキャプチャデバイスインプット)
AVキャプチャデバイスからの入力を表すクラスです。
最初はイメージし辛いですけど、AVFoundation F/W自体のしくみとして、セッションに直接デバイスをぶっ込むのでは無く、デバイスからインプットを生成してセッションにぶっ込む、という仕様になってます。
AVCaputureOutput (AVキャプチャアウトプット)
出力方法を表すクラスです。今回は AVCaptureStillImageOutput を使います。(他に AVCaptureVideoDataOutput も使える様です)
AVCaptureSession の sessionPreset
AVCaptureSession の sessionPresetは種類が色々ありますが、静止画専用の AVCaptureSessionPresetPhoto をセットしておけばデバイスの最大解像度で撮影してくれる筈です。iPhone5 で撮影すると確かに 640 × 1136 でした。
デフォルトはAVCaptureSessionPresetHighらしいです。デフォルトのままiPhone5 で撮影すると、1080 x 1920でした。
つまり一番高解像度なのはAVCaptureSessionPresetHigh (デフォルト) の様です。
セッションの設定を変更するのであれば、その前後で beginConfiguration() と commitConfiguration() をそれぞれ呼んであげましょう。
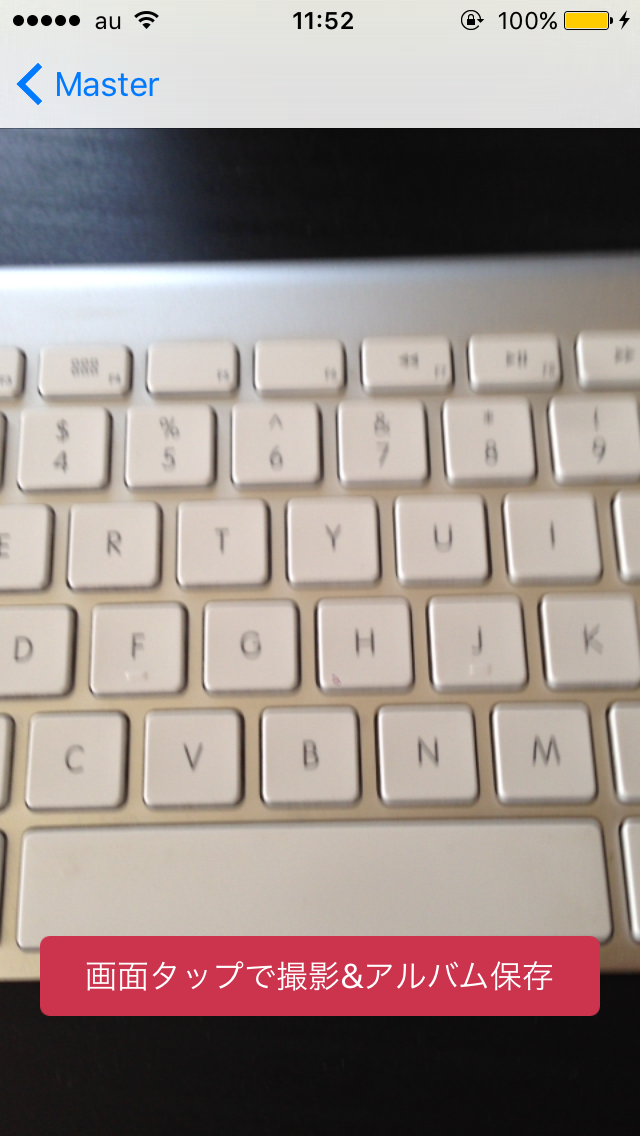
画面こんな感じ
追々画像をプレビューしたり、加工したりするつもりですが、現状では画面をタップすると撮影しアルバムに保存し、ウィンドウを閉じるだけです。
が、画面がブレてるのは手ブレ補正が効かない iPhone5 のせいだからね!
ソースコード
| // | |
| // CameraViewController.swift | |
| // | |
| // Created by Tadatoshi Hanazaki on 2016/01/17. | |
| // Copyright © 2016年 close-to.biz. All rights reserved. | |
| // | |
| import UIKit | |
| import AVFoundation | |
| class CameraViewController: UIViewController, UIGestureRecognizerDelegate { | |
| // AVキャプチャセッション | |
| var avSession: AVCaptureSession! | |
| // AVキャプチャデバイス | |
| var avDevice: AVCaptureDevice! | |
| // AVキャプチャデバイスインプット | |
| var avInput: AVCaptureInput! | |
| // AVキャプチャアウトプット | |
| var avOutput: AVCaptureStillImageOutput! | |
| override func viewDidLoad() { | |
| super.viewDidLoad() | |
| // 画面タップで撮影 | |
| let tapGesture: UITapGestureRecognizer = UITapGestureRecognizer(target: self, action: "takePhoto:") | |
| tapGesture.delegate = self; | |
| self.view.addGestureRecognizer(tapGesture) | |
| } | |
| override func viewWillAppear(animated: Bool) { | |
| super.viewWillAppear(animated) | |
| self.initCamera() | |
| } | |
| func initCamera() { | |
| // AVキャプチャセッション | |
| // (AVFoundationにおけるキャプチャ入出力を管理するクラス) | |
| avSession = AVCaptureSession() | |
| if (avSession.canSetSessionPreset(AVCaptureSessionPresetPhoto)) { | |
| avSession.beginConfiguration() | |
| // キャプチャクオリティ設定 | |
| // AVCaptureSessionPresetPhoto 写真専用、デバイスの最大解像度 | |
| // AVCaptureSessionPresetHigh 最高録画品質 (静止画でも一番高画質なのはコレ) | |
| // AVCaptureSessionPresetMedium WiFi向け | |
| // AVCaptureSessionPresetLow 3G向け | |
| // AVCaptureSessionPreset640x480 640x480 VGA固定 | |
| // AVCaptureSessionPreset1280x720 1280x720 HD固定 | |
| avSession.sessionPreset = AVCaptureSessionPresetPhoto | |
| avSession.commitConfiguration() | |
| } | |
| // AVキャプチャデバイス | |
| // (前背面カメラやマイク等のデバイス) | |
| let devices = AVCaptureDevice.devices() | |
| for capDevice in devices { | |
| if (capDevice.position == AVCaptureDevicePosition.Back) { | |
| // 背面カメラを取得 | |
| avDevice = capDevice as? AVCaptureDevice | |
| } | |
| } | |
| if (avDevice != nil) { | |
| // AVキャプチャデバイスインプット | |
| // (AVキャプチャデバイスからの入力) | |
| do { | |
| // バックカメラからVideoInputを取得 | |
| avInput = try AVCaptureDeviceInput.init(device: avDevice!) | |
| } catch let error as NSError { | |
| print(error) | |
| } | |
| // AVキャプチャデバイスインプットをセッションに追加 | |
| if (avSession.canAddInput(avInput)) { | |
| avSession.addInput(avInput) | |
| // AVキャプチャアウトプット (出力方法) | |
| // AVCaptureStillImageOutput: 静止画 | |
| // AVCaptureMovieFileOutput: 動画ファイル | |
| // AVCaptureAudioFileOutput: 音声ファイル | |
| // AVCaptureVideoDataOutput: 動画フレームデータ | |
| // AVCaptureAudioDataOutput: 音声データ | |
| avOutput = AVCaptureStillImageOutput() | |
| // 出力設定 | |
| avOutput.outputSettings = [AVVideoCodecKey: AVVideoCodecJPEG] | |
| // AVキャプチャアウトプットをセッションに追加 | |
| if (avSession.canAddOutput(avOutput)) { | |
| avSession.addOutput(avOutput) | |
| } | |
| // 画像を表示するレイヤーを生成. | |
| let capVideoLayer: AVCaptureVideoPreviewLayer = AVCaptureVideoPreviewLayer.init(session:avSession) | |
| capVideoLayer.frame = self.view.bounds | |
| capVideoLayer.videoGravity = AVLayerVideoGravityResizeAspectFill | |
| // AVLayerVideoGravityResizeAspectFill | |
| // アスペクト比維持 + 必要に応じてトリミング (縦いっぱいに表示し横をトリミング) | |
| // AVLayerVideoGravityResizeAspect | |
| // アスペクト比維持 (縦横とも収まる様に表示) | |
| // AVLayerVideoGravityResize | |
| // 利用可能な画面領域いっぱいにリサイズ | |
| // Viewに追加. | |
| self.view.layer.addSublayer(capVideoLayer) | |
| // セッション開始. | |
| avSession.startRunning() | |
| renderView() | |
| } | |
| } else { | |
| // UIAlertControllerを作成する. | |
| let sampleAlert: UIAlertController = UIAlertController(title: "", message: "背面カメラがある実機で動かしてね。", preferredStyle: .Alert) | |
| // アクションを作成、追加 | |
| let yesAction = UIAlertAction(title: "OK", style: .Default) { | |
| UIAlertAction in | |
| self.close() | |
| } | |
| sampleAlert.addAction(yesAction) | |
| // UIAlertを表示する | |
| self.presentViewController(sampleAlert, animated: true, completion: nil) | |
| } | |
| } | |
| // 画面を閉じる | |
| func close() { | |
| self.navigationController?.popViewControllerAnimated(true) | |
| } | |
| // 画面になにか重ねて表示する | |
| func renderView() { | |
| // 角丸なLabelを作成 | |
| let labelHello: UILabel = UILabel(frame: CGRectMake(0, 0, self.view.frame.size.width - 40, 40)) | |
| labelHello.layer.masksToBounds = true | |
| labelHello.layer.cornerRadius = 5.0 | |
| labelHello.lineBreakMode = NSLineBreakMode.ByCharWrapping | |
| labelHello.numberOfLines = 1 | |
| // 文字と文字色、背景色をセット | |
| labelHello.text = "画面タップで撮影&アルバム保存" | |
| labelHello.textColor = UIColor.whiteColor() | |
| labelHello.backgroundColor = UIColor.init(colorLiteralRed: 0.8, green: 0.2, blue: 0.3, alpha: 1.0) | |
| // 文字を中央寄せ、ウィンドウ中央に配置 | |
| labelHello.textAlignment = NSTextAlignment.Center | |
| labelHello.layer.position = CGPoint(x: self.view.bounds.width/2, y: self.view.bounds.height - 80) | |
| // ViewにLabelを追加. | |
| self.view.addSubview(labelHello) | |
| } | |
| // 撮影をする | |
| func takePhoto(sender: UITapGestureRecognizer){ | |
| // ビデオ出力に接続する | |
| let videoConnection = avOutput.connectionWithMediaType(AVMediaTypeVideo) | |
| // 接続から画像を取得する | |
| self.avOutput.captureStillImageAsynchronouslyFromConnection(videoConnection, completionHandler: { (imageDataBuffer, error) -> Void in | |
| // Jpegに変換する (NSDataにはExifなどのメタデータも含まれている) | |
| let imageData: NSData = AVCaptureStillImageOutput.jpegStillImageNSDataRepresentation(imageDataBuffer) | |
| // UIIMageを作成する | |
| let image: UIImage = UIImage(data: imageData)! | |
| // アルバムに追加する | |
| UIImageWriteToSavedPhotosAlbum(image, self, nil, nil) | |
| self.close() | |
| }) | |
| } | |
| override func didReceiveMemoryWarning() { | |
| super.didReceiveMemoryWarning() | |
| } | |
| override func viewDidAppear(animated: Bool) { | |
| super.viewDidAppear(animated) | |
| } | |
| override func viewWillDisappear(animated: Bool) { | |
| super.viewWillDisappear(animated) | |
| } | |
| override func viewDidDisappear(animated: Bool) { | |
| super.viewDidDisappear(animated) | |
| // カメラの停止とメモリ解放 | |
| self.avSession.stopRunning() | |
| for output in self.avSession.outputs { | |
| self.avSession.removeOutput(output as? AVCaptureOutput) | |
| } | |
| for input in self.avSession.inputs { | |
| self.avSession.removeInput(input as? AVCaptureInput) | |
| } | |
| self.avOutput = nil | |
| self.avInput = nil | |
| self.avDevice = nil | |
| self.avSession = nil | |
| } | |
| } |